Execution: Step 1. Channel Set-Up
In the last section, you chose which channels you’re going to use: again, you should have a website, you should choose one primary and one secondary social media platform, and it’s advisable to have a newsletter. Here’s how to set up your channels.
1. Setting Up Your Website
As mentioned above, the three basics of launching a website are:
Getting your domain name: Head to a site like GoDaddy to purchase your domain name.
Choose a website builder: Next, choose a platform where you will build your website (my personal favorite is Squarespace). Once you set up your website, you can have it link your domain to your website so that people can find you.
Set of hosting if not included: If your website builder doesn’t include website hosting, sign up at a place like Bluehost.
Creating your home page
Your homepage should tell everyone who you are and what you do as soon as they land
Authors: Include a header or tagline, a photo of yourself, and include your recent book to promote if you have one.
Bookstore: Tagline/header with who you are, book recommendations/selections, and sections for your different pages.
Literary organization: Who you are, and sections for your different pages. Be sure to include your social links on the homepage as well — a good place is either at the top next to your menu or in the footer.
Writing your about page
Your About page should include your biography and a photo that’s different from the one on the homepage (if you’re an author). If you’re a business or literary organization, include who you are, your origin story, your mission, and any other information that communicates your brand and can connect it to your audience.
Setting up a contact page
Make sure your audience or customers have a way to contact you. I recommend setting up a form through your website builder that people can use to contact you, instead of having your email displayed on the website (which may be used by spammers). If you’re a business, make sure to have your address and phone number there as well.
Setting up an events page
If you’re a bookstore or literary organization, set up an events calendar. Your website builder should have a calendar function that you can use to enter the details of your events. Or, use Eventbrite as another option.
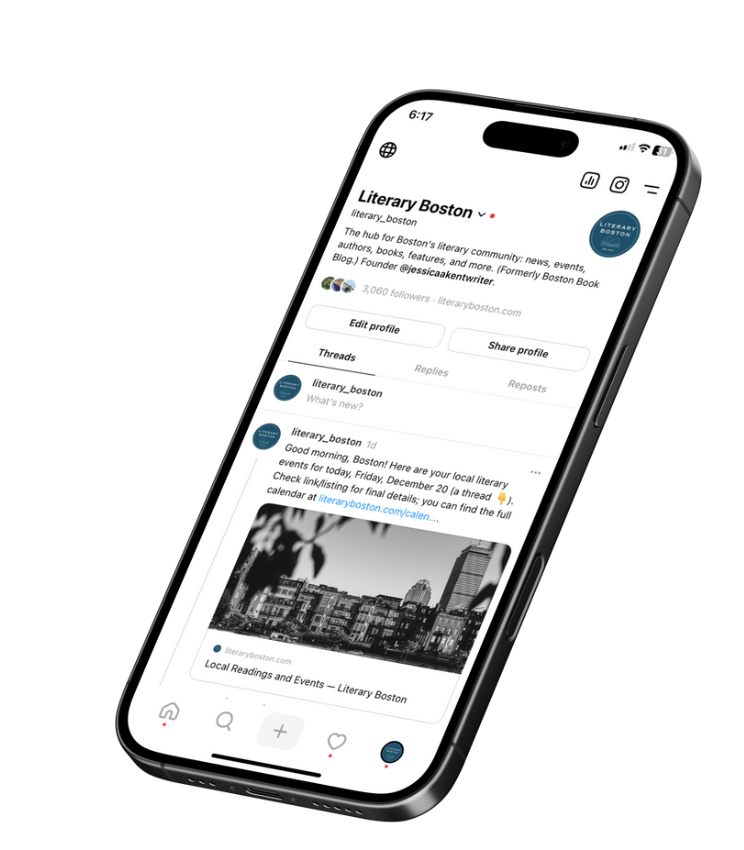
As someone who has tracked literary events for 12 years as part of my work with Literary Boston, here are some best practices:
Include the author’s name as they want it to appear professionally.
Include the full title of the book (for nonfiction, that includes the part of the title after the colon).
Make it very clear who the in-conversation-with is; they should not get top billing alongside the author.
Include an author photo and book cover image.
If there’s an in-conversation-with, make it very clear who the author’s photo is and the in-conversation-with photo.
Do not post your event as an image, or if you have your event as an image, also include text on the page (accessibility text readers cannot read your text on an image).
Once you create the event and the URL, don’t keep changing the URL as you add details, because it will break the link of outside sites who have linked to your event.
Include a book summary and the author’s bio.
Always use a publicly accessible calendar on a website. Don’t set up a shareable Google calendar or just post events on an Instagram page.
If your website doesn’t have a calendar function, Eventbrite is a great option!
2. Setting Up Your Blog
Setting up your blog is relatively simple if you’re hosting it on your website. Your website builder will likely have a “blog” option (I know Squarespace does) that will organize that page into articles. Simply add a new blog post, write it out, and publish.
If you’d like to set up a blog independently, choose a site to use, like Medium or Blogger, or you can even use the articles feature on LinkedIn, and get writing!
3. Setting Up a Professional Email
Make sure to have a professional-looking email, especially if you’re an author. Ideally, your email should be associated with your domain name — info@mybookstore.com or info@kentliterarymarketing.com — so you would set this up with your domain provider or website builder that you’ve linked your domain to.
For example, I have Squarespace create my email addresses (which are actually Google email addresses). Sounds tricky, but Squarespace makes it happen in about three clicks. You can also set up new email addresses directly through Google as well, but you have to own a domain already to do so — they check!
4. Setting Up Your Social Media Profiles
Once you’ve chosen your social media platforms, you want to make sure that your profiles are optimally set up across your channels. Here’s how:
Instagram Profile Set-Up and Optimization

Download the Instagram app (you can use Instagram on a web browser, but it’s not how the platform was meant to be used) and follow the instructions for set-up.
Profile photo: Add a profile picture that’s either your logo or a professional headshot. Use the same profile picture or logo for your brand across all social media accounts.
Name: Align your name with your business or brand.
Username: Choose a username that aligns with your business or brand (e.g., @jessicaakentwriter instead of @jessica5293829).
Bio: Fill out the bio to include who you are, what you do, who you help, and other brand-related statements. Include a call to action, if you can. Align your bio with your brand voice and include any relevant keywords as well.
Add your links: Use the links option to add links to your website, newsletter subscription page, and one other key page (blog, events page, etc.). Instagram only used to allow one link; now they allow up to five links (so no need to use Linktr.ee or other third-party apps anymore!).
Make it a professional account: Make sure to set the page up as a professional or business profile so that you can have more options for ads, analytics, ecommerce, and other features. Do this by going to Settings > For professionals: Account type and tools > Switch to professional account. You can always switch this back.
Link Facebook: If you’d like, link your Facebook account by going to Settings > Accounts Center > Profiles > Add accounts > Add Facebook account.
Set extra business information: Once your account is set up, go to Edit Profile > Public business information to add contact options, action buttons, or other details.
Set to “public”: Finally, make sure your account is public. (Settings > Who can see your content > Account privacy > Public)
Threads Profile Set-Up and Optimization
Since Threads is owned by Meta, everyone who has an Instagram or Facebook account already has a Threads account — you simply have to claim it. Go to Instagram, go to your profile, and click on the Threads link, or download the Threads app and follow the instructions for set-up.
Because Threads and Instagram are linked, you can simply import your already-created Instagram profile into Threads. Otherwise, you can manually create it with the following:
Profile photo: Add a profile picture that’s either your logo or a professional headshot. Use the same profile picture or logo for your brand across all social media accounts.
Name: Align your name with your business or brand.
Username: Choose a username that aligns with your business or brand (e.g., @jessicaakentwriter instead of @jessica5293829).
Bio: Fill out the bio to include who you are, what you do, who you help, and other brand-related statements. Include a call to action, if you can. Align your bio with your brand voice and include any relevant keywords as well.
Add your link: Use the link option to add a link to your website, newsletter subscription page, or other key page.
Set to “public”: Finally, make sure your account is public. (Settings > Who can see your content > Account privacy > Public)
Facebook Profile Set-Up and Optimization
Download the Facebook app or head to Facebook.com in a web browser and follow the instructions for set-up.
Professional profile or business page: First, determine what type of account you want to create. A professional profile is great for individual creators and solopreneurs, and requires simply making your personal profile a professional one. Or, if you’re a business entity, create a page showcasing your organization and build a following. (Note that you can’t turn your personal profile into a business page.)
Profile photo: Add a profile picture that’s either your logo or a professional headshot. Use the same profile picture or logo for your brand across all social media accounts.
Cover photo: Additionally, choose a cover photo that aligns with your brand, and that’s ideally a graphic communicating who you are, your offerings, and a link.
Name: Align your name with your business or brand.
Bio: Fill out the bio to include who you are, what you do, who you help, and other brand-related statements. Include a call to action, if you can. Align your bio with your brand voice and include any relevant keywords as well.
Select your profile category: If you have a professional account, select a category so that your followers will know what you do.
Add your links: Use the links option to add links to your website, newsletter subscription page, and one other key page (blog, events page, etc.).
Link Instagram: If you’d like, link your Instagram account by going to Settings > Accounts Center > Profiles > Add accounts > Add Instagram account.
Set to “public”: Finally, make sure your account is public (in View Tools or Settings).
LinkedIn Profile Set-Up and Optimization
Download the LinkedIn app or head to LinkedIn.com in a web browser and follow the instructions for set-up.
Profile photo: Add a profile picture that’s either your logo or a professional headshot. Use the same profile picture or logo for your brand across all social media accounts.
Cover photo: Additionally, choose a cover photo that aligns with your brand, and that’s ideally a graphic communicating who you are, your offerings, and a link.
Headline: Your headline should tell the world what you do. Some use it to post a job title, yet others use the headline to capture their offer: “I help X companies achieve Y results.” Be creative, yet stick to the 220-character limit.
Intro information: Fill out the rest of your intro information with your industry, education, and location. Don’t forget to include a “Custom button,” like linking to your website or newsletter subscription page.
Open to: If you’re looking for work, you can adjust your “Open to” settings to show others that you’re available.
About section: Next, write your “About” section, which is the story you want to tell about yourself and your career. Include who you are, what you do, who you help, and other brand-related statements. Include a call to action, if you can. Align your bio with your brand voice and include any relevant keywords as well.
Featured: Take advantage of the “Featured” section by adding relevant calls to action, like linking to your newsletter sign-up, your portfolio, or a course you’ve created.
Experience: Finally, fill out your experience with your work history.
TikTok Profile Set-Up and Optimization

Download the TikTok app and follow the instructions for set-up.
Profile photo: Add a profile picture that’s either your logo or a professional headshot. Use the same profile picture or logo for your brand across all social media accounts.
Name: Align your name with your business or brand.
Username: Choose a username that aligns with your business or brand (e.g., @jessicaakentwriter instead of @jessica5293829).
Bio: Fill out the bio to include who you are, what you do, who you help, and other brand-related statements. Include a call to action, if you can. Align your bio with your brand voice and include any relevant keywords as well.
Add social links: Add links to your other social media accounts (you can’t add the link to a website, sorry).
Make it a business account: If you’re a business, make sure to set the account up as a business profile so that you can have more options for ads, analytics, ecommerce, and other features. Do this by going to the three lines at the top right > Setting and Privacy > Account > Switch to Business Account. You can always switch this back.
Set to “public”: Finally, make sure your account is public. (Setting and Privacy > Privacy > uncheck “Private account”)
5. Setting Up Your Newsletter

Setting up a newsletter is relatively simple, and likely the hardest part will be choosing which service to use: Mailchimp, Kit, Substack, Beehiv, or any others. Once you’ve decided, simply go through the set-up process — and don’t forget to use your professional email to set up your account, as that’s the one that will appear when you send your emails. Don’t forget that newsletters are required to have a physical mailing address or PO Box in the footer, so be sure to include that, too.
What’s the best newsletter platform? Many writers today use Substack, which is a newsletter/blogging/landing page/semi-social platform — yet hardly anyone outside of the writing community uses it, and it has a few drawbacks. I personally have been using Mailchimp for years: easy to use, free up to 500 subscribers, automations, analytics, templates, and more. I also just started using Kit, which has similar features and a creator network to recommend other followers. Ultimately the best newsletter platform is the one you actually use!
In the next step, we’ll look at how to build a content calendar.
Hi! I’m Jessica, and I help literary businesses, organizations, and authors build and execute their marketing strategies. If you'd like to learn how to do this 👆, come work with me!